




Description
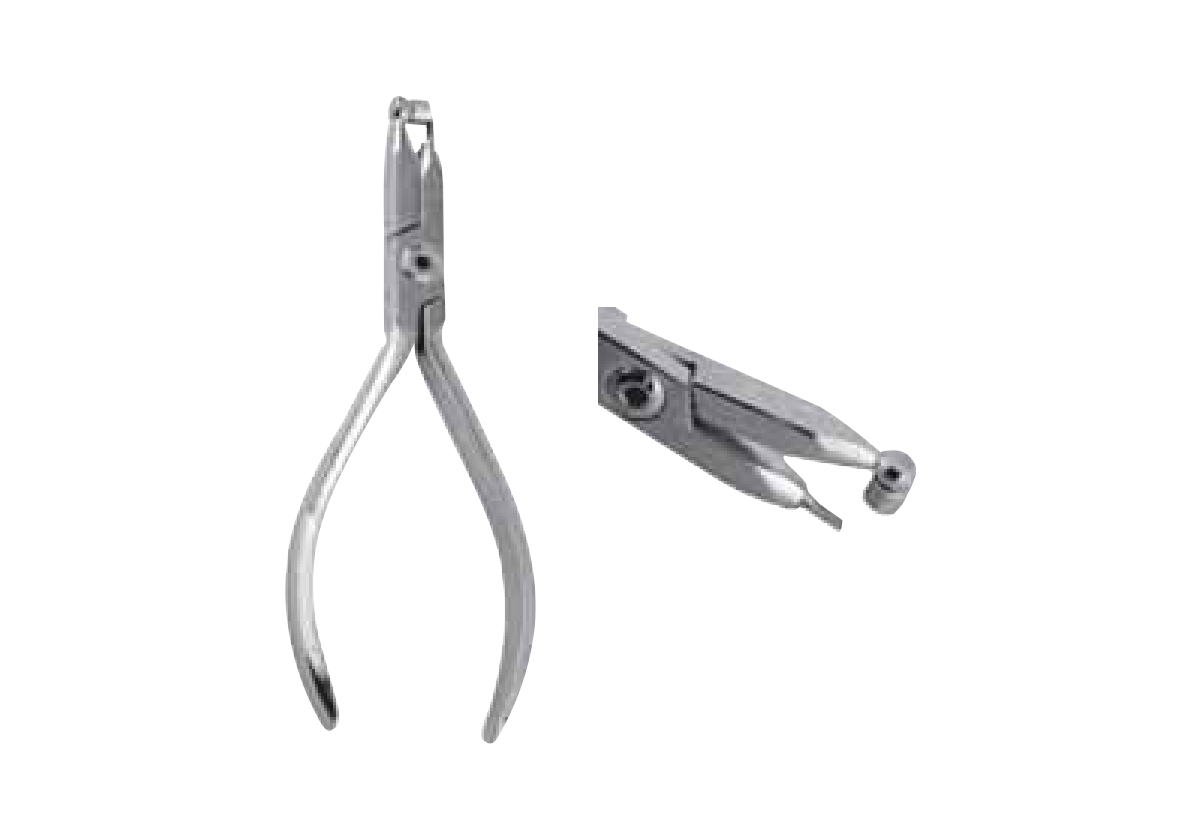
Adhesive Removing Pliers
Adhesive removing pliers help at the end of fixed treatment. Once the brackets come off, some bonding resin often stays on the tooth. This plier lets you lift that layer away before you polish.
The order of a debond visit
Debond day has a set order. To begin, the brackets come off. Next, you clear the leftover resin. After that you polish and take records for the retainer. This plier fits the second step.
Working with care on enamel
Go slowly and use light force. Also, keep the tip on the resin, not the enamel, so you do not mark the tooth. Good light and a dry field help you see the edge of the resin.
Debond tray partners
- A bracket remover for the first step
- A scaler for small spots near the gum line
- Your usual polishing kit for the finish
What the catalogue gives us
The catalogue simply lists this item as an adhesive removing plier. It gives no tip sizes or angles. For that reason, please check the photo, and ask us if you want more on the form.
Resin on the tip
Resin can build up on the tip during use. So wipe it off before it sets hard, then clean as usual. A clean tip also gives you a better feel for the edge.
Ordering the debond plier
Our specification sets the design, and a team member in the United States inspects it. For the metal we picked stainless steel in step with ASTM F899. Since it ships non-sterile, put it through cleaning and sterilising first; you can then reuse it at each debond. If the build proves faulty, we repair it at no charge under three years against manufacturing defects. For step one of the visit, see our bracket removing pliers. You can also scan the orthodontic instrument list or the help section.
Sold to dental professionals. Our reprocessing page and shipping times are a good read.

Reviews
There are no reviews yet.