
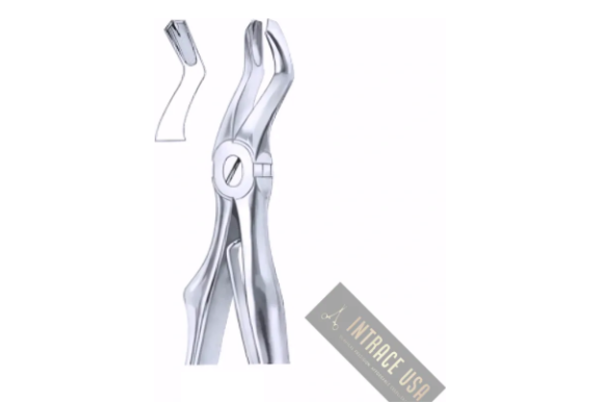




Description
Forceps for children, Fig. 1 to Fig. 7
Seven patterns cover the whole of a child’s mouth. Fig. 1 through Fig. 4 work the upper arch, Fig. 5 through Fig. 7 the lower. Each is stainless steel, and each is built to the same weight and finish. Pick the figure that matches the tooth and the arch, and the rest of the range behaves identically in the hand.
Why a child’s forceps is not a small adult one
The obvious difference is scale. The important one is shape. A deciduous crown is short and bulbous, and it narrows sharply at the neck, so a beak cut for a permanent tooth sits too high and slips. These beaks are ground to meet that narrower neck squarely.
Handle length matters as well. Shorter handles move less force for the same squeeze, which is what you want on a tooth whose roots are already resorbing. Consequently the operator feels the tooth release rather than discovering it afterwards.
Reading the figure numbers
The numbering is sequential and it follows the mouth, so it is quick to learn. Upper first, then lower; and within each arch, front to back and then roots.
The seven patterns
| Figure | Arch | For |
|---|---|---|
| Fig. 1 | Upper | Incisors |
| Fig. 2 | Upper | Premolars |
| Fig. 3 | Upper | Molars |
| Fig. 4 | Upper | Roots |
| Fig. 5 | Lower | Incisors |
| Fig. 6 | Lower | Molars |
| Fig. 7 | Lower | Roots |
Every pattern is the same price, so a practice can build the range one figure at a time or take the whole set without doing any arithmetic.
Where the upper and lower patterns differ
Arch position drives the geometry. Upper patterns angle the beaks away from the handle so the instrument clears the lower lip and the operator keeps a view of the tooth. Lower patterns bring the beaks round much further, close to a right angle, because the approach comes from above. That is why a lower figure cannot stand in for an upper one even when the beak width looks similar.
Stocking a paediatric tray
Few practices need all seven at once. Most start with the molar and root patterns, since those are the extractions that actually come through the door: Fig. 3 and Fig. 6 for molars, Fig. 4 and Fig. 7 for retained roots. Incisor patterns follow later, and Fig. 2 tends to be the last one bought.
Care between patients
Clean the beaks first and the joint second. Debris packs into the serrations at the tip, and it hardens there if it is left to dry, so brush the working end under water straight after use. Then work the joint a few times while it is wet. Process and autoclave as usual, and check that the beaks still meet cleanly before the instrument goes back on the tray.
Intrace USA guarantees every pattern in this range for three years against manufacturing defects.

Reviews
There are no reviews yet.